
Using Pusher to Build a Basic Chat Application in Django
Chat applications often rely on components to facilitate real-time interactions among users, but these components can be difficult to set up. In the Django ecosystem, for example, we might have to find the right versions of packages like channels, channels-redis, and associated packages that all have the most recent features we want to use and are compatible with each other. Once these packages work together, we still have to get the code running in an actual application split between a Django backend and a Javascript frontend.
Pusher offers API services that can help developers build real-time features and notifications across multiple platforms, including Django. They have open-source libraries for their APIs. Let’s look at how we can use Pusher’s Channel service to build a simple Django chat application.
This tutorial will assume that you have Python installed on your computer and are working in a virtual environment, such as conda or venv.
Set up Django
Install Django.
pip install djangoCreate a new project. For this tutorial, I’ve named the app ‘experiment.’
django-admin startproject experimentEnter that folder using cd experiment. Create a new application with the project. I’ve called mine ‘chat’.
python manage.py startapp chatAdd the new application to /experiment/settings.py.
INSTALLED_APPS = [
    "django.contrib.admin",
    "django.contrib.auth",
    "django.contrib.contenttypes",
    "django.contrib.sessions",
    "django.contrib.messages",
    "django.contrib.staticfiles",
    "chat"
]
Now we need to set up routes within our project. These will form the URL to get to the chat application. In /experiment/urls.py, add include and the path to the chat app like below.
from django.contrib import admin
from django.urls import path, include  # Added 'include'

urlpatterns = [
    path("admin/", admin.site.urls),
    path("chat/", include('chat.urls'))  # Added
]
In the /chat/ folder, add a urls.py with the following code.
from django.urls import path
from .views import (
    chatroom,
    send_message
)

urlpatterns = [
    path("", chatroom, name='chatroom'),
    path("test", send_message, name='test')
]
With the routes set up, we can visit localhost:8000/chat to access our chat application. We’ll use localhost:8000/test to send messages to Pusher. In /chat/views.py, we will build the functionality to display the chat page and send messages. For now, we’ll just pass in send_message.
from django.shortcuts import render
def chatroom(request):
return render(request, 'chat/chat.html')
def send_message(request):
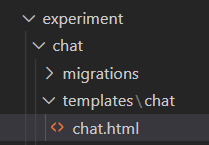
passThe chatroom function references chat.html. We need to make that file. In the chat folder, create a ‘templates’ folder. Inside there, create another ‘chat’ folder. After the chat/templates/chat folders are ready, create chat.html inside the chat subdirectory. We’ll leave it blank for now.
Let’s move on to set up Pusher. Create an account at Pusher.com.

Click on Channels.

Set up your application. The important settings for this tutorial are to choose Vanilla JS for the frontend and Django for the backend. When you’ve finished, click Create app.

The Getting Started page will provide you with frontend and backend code.
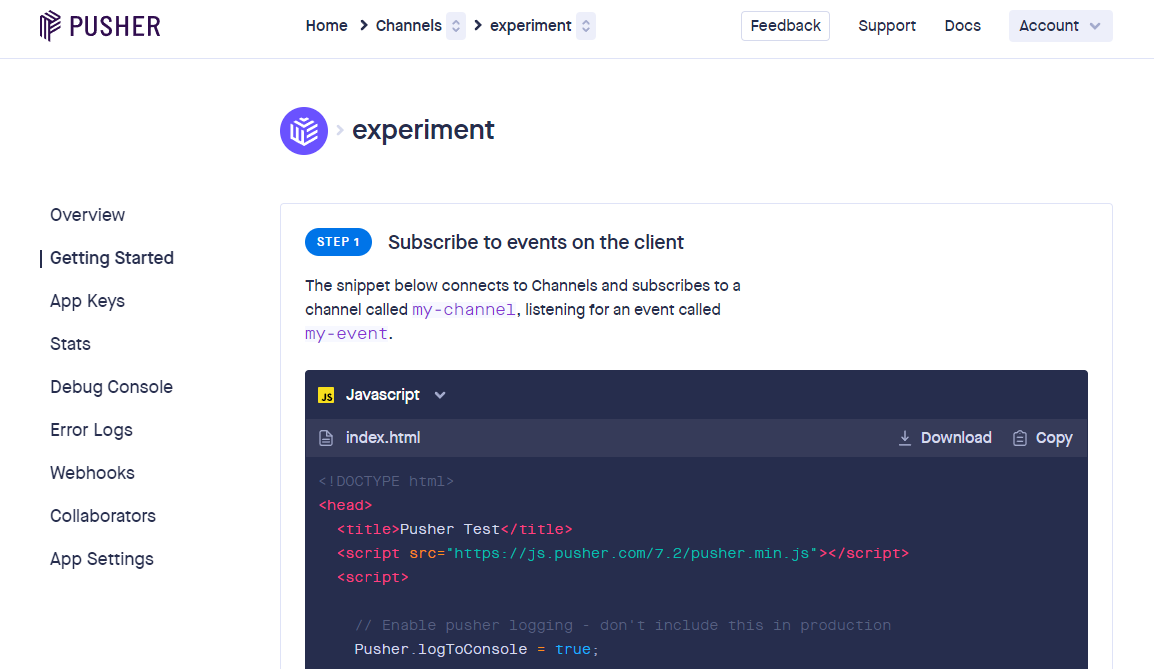
Copy the code from the Javascript section into the chat.html template. The template Pusher provides for you will already have your server id in the app.
<!DOCTYPE html>
<head>
  <title>Pusher Test</title>
  <script src="https://js.pusher.com/7.2/pusher.min.js"></script>
  <script>

    // Enable pusher logging - don't include this in production
    Pusher.logToConsole = true;

    var pusher = new Pusher('{your-server-id-here}', {
      cluster: 'ap3'
    });

    var channel = pusher.subscribe('my-channel');
    channel.bind('my-event', function(data) {
      alert(JSON.stringify(data));
    });
  </script>
</head>
<body>
  <h1>Pusher Test</h1>
  <p>
    Try publishing an event to channel <code>my-channel</code>
    with event name <code>my-event</code>.
  </p>
</body>
Now copy the code from the Python section into the send_message function in views.py. Again, note that the application information will already be available in the template Pusher provides.
import pusher
from django.shortcuts import render

def chatroom(request):
    return render(request, 'chat/chat.html')

def send_message(request):
    pusher_client = pusher.Pusher(
      app_id='{your-app_id}',
      key='{your-key}',
      secret='{your-secret}',
      cluster='ap3',
      ssl=True
    )

    pusher_client.trigger('my-channel', 'my-event', {'message': 'hello world'})
In the terminal, we need to actually install the pusher package into our application.
pip install pusherOur app doesn’t do much right now. We need to make our frontend template communicate with the backend view. Specifically, we want to be able to type a message in the frontend and have the backend send it to the channel, which will send it out to all the other users who are connected to our application.
First, let’s replace what’s in the body section in chat.html. We’ll label the page as “Chat Test.” Then, we’ll add in a form with a single input field and a submit button. The user will type their message, hit submit, and the form will process the message.
<h1>Chat Test</h1>
<form id="message_form">
  {% csrf_token %}
  <label for="message">Enter your message:</label><br />
  <input type="text" id="message" name="message"><br />
  <input type="submit" value="submit">
</form>
Where do we want the message to appear, though?
Instead of the alert the template has, we want to have the message appear in a chat window. Let’s make that chat window by adding a div below the form.
<div id="chat-container">
  <h3>Chat</h3>
  <div id="chat-panel">
  </div>
</div>
As I mentioned, we don’t want an alert, so we need to change the Pusher code to add new messages to the div. We’ll update the channel.bind function to get the chat window and insert new messages before the bottom of the div. The regex working on the message removes quotation marks from the front and back of the input (Thanks to this StackOverflow post).
<script>

      // Enable pusher logging - don't include this in production
      Pusher.logToConsole = true;

      var pusher = new Pusher('{your-server-id-here}', {
        cluster: 'ap3'
      });

      var channel = pusher.subscribe('my-channel');
      channel.bind('my-event', function(data) {
        message = JSON.stringify(data)
        document.querySelector("#chat-panel").insertAdjacentHTML('beforeend', '<p>' + message.replace(/^"(.+(?="$))"$/, '$1') + '</p>')
      });

    </script>
Now we come back to the main problem. We need the frontend (our template) to send the message to the backend (our view). Also, we don’t want the page to refresh because the messages will be lost.
To get around this, we will use AJAX. Asynchronous Javascript and XML (AJAX) will help us send data to the backend without messing up our view. The page won’t reload, and Channels will take care of pushing the new message to our (and other users’) display.
Before getting to AJAX, though, we need to get a csrf token because Django requires it. You may have noticed this in the form we added earlier (ie., {% csrf_token %}). Cross Site Request Forgery tokens help protect against malicious web attacks. Django provides a function we can just copy into our application to generate this token. Whew…lucky!
Under the </body> tag, we will add another <script> section for this Javascript.
<script>
  function getCookie(name) {
    let cookieValue = null;
    if (document.cookie && document.cookie !== '') {
        const cookies = document.cookie.split(';');
        for (let i = 0; i < cookies.length; i++) {
          const cookie = cookies[i].trim();
          // Does this cookie string begin with the name we want?
          if (cookie.substring(0, name.length + 1) === (name + '=')) {
             cookieValue = decodeURIComponent(cookie.substring(name.length + 1));
             break;
          }
       }
    }
    return cookieValue;
  }
  const csrftoken = getCookie('csrftoken');
</script>
Now, we can create an AJAX post request. When the user submits the form, we will stop the page from submitting it normally. Instead, we will send the request through our /test URL, which will trigger the send_message function. We’ll use the csrftoken we created in the header, and we’ll use {{ csrf_token }} to handle the middleware. Add this code under the csrf function above but before the </script> tag.
$("#message_form").submit(function(e) {
  e.preventDefault();

  message = $('#message').val()

  var $form = $(this),
    url = "{% url 'test' %}"

  var posting = $.post(url, {
    message: message,
    headers: {'X-CSRFToken': csrftoken},
    csrfmiddlewaretoken: '{{ csrf_token }}',
    mode: 'same-origin',
    method: 'POST'
  })
})
</script>
Our Javascript here is actually using Jquery because that makes the syntax of the AJAX request a bit simpler. However, we haven’t actually incorporated Jquery into our project yet. Add in Jquery above the Pusher script.
<script src="https://ajax.googleapis.com/ajax/libs/jquery/3.6.1/jquery.min.js"></script> # Added
<script src="https://js.pusher.com/7.2/pusher.min.js"></script>
We need to update the send_message function to receive the AJAX request. The main changes here are that we are listening for a POST request, extracting the message from the request, and sending that message to our Pusher channel.
import pusher
from django.shortcuts import render
from django.http import JsonResponse # Added

def send_message(request):
    if request.POST.get('method') == 'POST':  # Added
        message = request.POST.get('message')   # Added

    pusher_client = pusher.Pusher(
        app_id='{your-app_id}',
        key='{your-key}',
        secret='{your-secret}',
        cluster='ap3',
        ssl=True
    )

    pusher_client.trigger(
        'my-channel',
        'my-event',
        message  # Changed
    )

    return JsonResponse({'status':'complete'})
With that, our chat application should be working. Run the server, and visit http://localhost:8000/chat/.
python manage.py runserverEnter your message, and you should see it pop up in the chat window.

However, it would be great if we could see how many users were actually subscribed to the chat. To do that, we need to adjust a few settings in Pusher. Click on App Settings.

Enable both subscription settings.

Now, in views.py, we will add another channel.bind event under the ‘my-event’ bind. For now, we will just display the subscription using console.log.
channel.bind('pusher:subscription_count', function(data) {
  console.log("SUBSCRIPTION: ", data.subscription_count);
});
When you connect to localhost:8000/chat, you should be able to see how many users have the application open. You can test this by opening the page in several browsers.
Let’s go just a bit further and add a few final improvements. The application doesn’t tell who the message is coming from, and there is no styling to distinguish users. To do both, we’ll work with Django’s authentication system and add in some CSS.
Django has a default authentication system that includes a user model, url routing, and even web page templates.
In experiment/urls.py, add a path to the default authentication system.
from django.conf import settings  # Added
from django.contrib import admin
from django.contrib.auth import views as auth_views   # Added
from django.urls import path, include

urlpatterns = [
    path("admin/", admin.site.urls),
    path("chat/", include('chat.urls')),
    path('accounts/', include('django.contrib.auth.urls')),  # Added
]
Now we need to set up a login page. For the purposes of this tutorial, we are going to rely on the default authentication system as much as possible. However, we aren’t going to set up every single page and route, like the password reset page. To get around creating more than we need to demonstrate Pusher, we will make a custom login page. In a real project, you would need to consider these other routes and maybe even make a custom user model to suit your project’s needs.
In the experiment’s project folder, make a templates folder. Then, inside templates, make a registration folder. The names here are important since we are using Django’s default authentication system. In the registration folder (experiment/templates/registration), make login.html.
Add the content below. I basically copied this from Django’s authentication documentation with slight modifications. Note that we don’t need {% block content %} because we don’t have a base.html template with a content tag. I left these template tags in, though, to emphasize that we are making a barebones page and there are other things that you need to consider in a real app.
{% block content %}

  {% if form.errors %}
    <p>Your username and password didn't match. Please try again.</p>
  {% endif %}

  {% if next %}
    {% if user.is_authenticated %}
      <p>Your account doesn't have access to this page. To proceed,
      please login with an account that has access.</p>
    {% else %}
      <p>Please login to see this page.</p>
    {% endif %}
  {% endif %}

  <form method="post" action="{% url 'login' %}">
    {% csrf_token %}
    <table>
      <tr>
        <td>{{ form.username.label_tag }}</td>
        <td>{{ form.username }}</td>
      </tr>
      <tr>
        <td>{{ form.password.label_tag }}</td>
        <td>{{ form.password }}</td>
      </tr>
    </table>
    <input type="submit" value="login">
    <input type="hidden" name="next" value="{{ next }}">
  </form>

  {# Assumes you setup the password_reset view in your URLconf #}
  <p><a href="{% url 'password_reset' %}">Lost password?</a></p>

{% endblock %}
For our application to find the template, we need to add the experiment project folder to the INSTALLED_APPS in settings.py.
INSTALLED_APPS = [
    "django.contrib.admin",
    "django.contrib.auth",
    "django.contrib.contenttypes",
    "django.contrib.sessions",
    "django.contrib.messages",
    "django.contrib.staticfiles",
    'chat',
    'experiment'
]
The default authentication system redirects to a profile page after logging in. We won’t be setting up a profile page, so we need to specify a new redirect location in settings.py.
LOGIN_REDIRECT_URL = '/chat'Now we need a user! Run the commands below to set up the database tables and make a superuser. With this admin user, we can test the application and create other users for testing.
python manage.py migrate
python manage.py createsuperuser
Now try out the login page! Visit localhost:8000/accounts/login. You should be able to log in with the admin account.

Let’s make one more user, so that we can test our chat system later. Go to localhost:8000/admin. In the Users section, click ADD USER to make another account. Remember the username and password for testing.

We can tap into Django’s authentication system to get the current user account when someone logs in to use our chat. Django already gives us access to the user object in our templates without any extra setup. We’ll distinguish our messages in the chat based on the username.
In chat.html, we’ll add the username to a message the user submits. The format we’ll use a {username}: {message}. Note that there is no space before the colon (:) and one space after.
$("#message_form").submit(function(e) {
  e.preventDefault();

  message = $('#message').val()

  const username = "{{user.username}}"
  var $form = $(this),
    url = "{% url 'test' %}"

  var posting = $.post(url, {
    message: username + ': ' + message,
    headers: {'X-CSRFToken': csrftoken},
    csrfmiddlewaretoken: '{{ csrf_token }}',
    mode: 'same-origin',
    method: 'POST'
  })
})
When we receive a message, we want to extract the username. Then, we can check whether it matches our current user to see which styling to use for the message. We’ll change the ‘my-event’ channel.bind like below:
var channel = pusher.subscribe('my-channel');
channel.bind('my-event', function(data) {
  message = JSON.stringify(data)
  message_clean = message.replace(/^"(.+(?="$))"$/, '$1')
  user = message_clean.match(/.*?(?=:|$)/)

  if (user[0] == "{{user.username}}") {
    document.querySelector("#chat-panel").insertAdjacentHTML('beforeend', '<p class="fromme">' + message_clean + '</p>')
  } else {
    document.querySelector("#chat-panel").insertAdjacentHTML('beforeend', '<p class="someoneelse">' + message_clean + '</p>')
  }
The final thing we need to do is add the styling for both message types. In settings.py, include both of these entries.
STATIC_ROOT = BASE_DIR / "static"
STATIC_URL = "/static/"
In /experiment/urls.py, add those settings to our paths. Note that this works when DEBUG is True. In a production setting, you would need to run python manage.py collectstatic and use a package like whitenoise. For local development, though, this should be enough. In the code below, we import static at the top of our page, and we add the settings we created at the bottom.
from django.conf import settings
from django.conf.urls.static import static # Added
from django.contrib import admin
from django.contrib.auth import views as auth_views
from django.urls import path, include


urlpatterns = [
    path("admin/", admin.site.urls),
    path("chat/", include('chat.urls')),
    path('accounts/', include('django.contrib.auth.urls')),
]
if settings.DEBUG:                                # Added
    urlpatterns += static(settings.STATIC_URL, document_root=settings.STATIC_ROOT)
Now we need to create a folder in /chat for the CSS file. In /chat/, make a static folder. Then, in /chat/static, make a chat folder.

In that folder, create main.css, and add the following css:
.from-me {
    background: lightgreen;
    width: 100px;
    height: 100px;
    border-radius: 5px
}

.someone-else {
    background: lightgrey;
    width: 100px;
    height: 100px;
    border-radius: 5px
}
To use the CSS, modify the beginning of chat.html as follows:
{% load static %}  # Added

<head>
  <title>Pusher Test</title>
  <script src="https://ajax.googleapis.com/ajax/libs/jquery/3.6.1/jquery.min.js"></script>
  <script src="https://js.pusher.com/7.2/pusher.min.js"></script>
  <link rel="stylesheet" type="text/css" href="{% static 'chat/main.css' %}">  # Added
Run your server again (python manage.py runserver) if it’s not running already. Open a few different browsers or an incognito window. That will let you test how the application handles multiple users.
In this tutorial, we’ve covered how to use Pusher to make a basic real-time chat application. We have set up this feature without handling things like channels or Redis ourselves. You can view the source code for this project at this repository.
While we have a nice start with this application, there are certainly many ways to improve upon it. Here are some additional things you might try.
How might you expand on the styling to make the application look better? Would you change the position of the username? Where could the current subscriber count go?
Could you integrate a better interface to make it easier to type longer or more complex messages? Django has many WYSIWYG editors. For example, TinyMCE offers a nice WYSIWYG editor (and is also open-source!).